Noter
Cliquez ici pour télécharger l'exemple de code complet
Rendu plus rapide en utilisant le blitting #
Le blitting est une technique standard dans les graphiques raster qui, dans le contexte de Matplotlib, peut être utilisée pour améliorer (considérablement) les performances des figures interactives. Par exemple, les
modules animationet widgetsutilisent le blitting en interne. Ici, nous montrons comment implémenter votre propre blitting, en dehors de ces classes.
Le blitting accélère le dessin répétitif en rendant une fois tous les éléments graphiques non changeants dans une image d'arrière-plan. Ensuite, pour chaque tirage, seuls les éléments changeants doivent être dessinés sur ce fond. Par exemple, si les limites d'un axe n'ont pas changé, nous pouvons restituer les axes vides, y compris tous les ticks et étiquettes, et ne dessiner les données modifiées que plus tard.
La stratégie est
Préparez le fond constant :
Dessinez la figure, mais excluez tous les artistes que vous souhaitez animer en les marquant comme animés (voir
Artist.set_animated).Enregistrez une copie du tampon RBGA.
Rendre les images individuelles :
Restaurez la copie du tampon RGBA.
Redessinez les artistes animés à l'aide de
Axes.draw_artist/Figure.draw_artist.Affichez l'image résultante à l'écran.
Une conséquence de cette procédure est que vos artistes animés sont toujours dessinés au-dessus des artistes statiques.
Tous les backends ne prennent pas en charge le blitting. Vous pouvez vérifier si une toile donnée le fait via la FigureCanvasBase.supports_blitpropriété.
Avertissement
Ce code ne fonctionne pas avec le backend OSX (mais fonctionne avec d'autres backends GUI sur mac).
Exemple minimal #
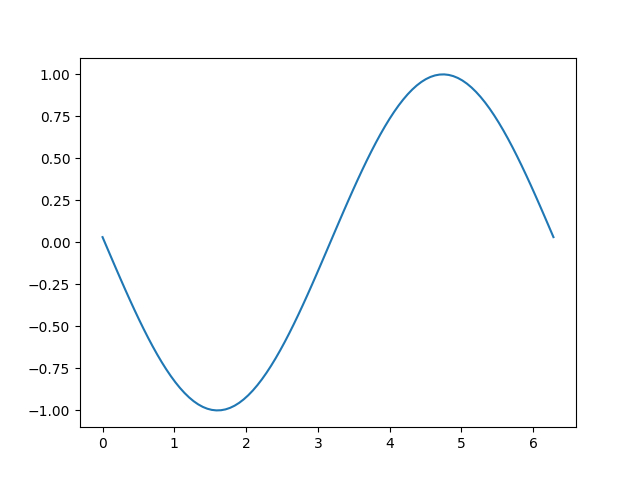
Nous pouvons utiliser les FigureCanvasAggméthodes
copy_from_bboxet
restore_regionen conjonction avec la configuration
animated=Truede notre artiste pour implémenter un exemple minimal qui utilise le blitting pour accélérer le rendu
import matplotlib.pyplot as plt
import numpy as np

x = np.linspace(0, 2 * np.pi, 100)

fig, ax = plt.subplots()

# animated=True tells matplotlib to only draw the artist when we
# explicitly request it
(ln,) = ax.plot(x, np.sin(x), animated=True)

# make sure the window is raised, but the script keeps going
plt.show(block=False)

# stop to admire our empty window axes and ensure it is rendered at
# least once.
#
# We need to fully draw the figure at its final size on the screen
# before we continue on so that :
#  a) we have the correctly sized and drawn background to grab
#  b) we have a cached renderer so that ``ax.draw_artist`` works
# so we spin the event loop to let the backend process any pending operations
plt.pause(0.1)

# get copy of entire figure (everything inside fig.bbox) sans animated artist
bg = fig.canvas.copy_from_bbox(fig.bbox)
# draw the animated artist, this uses a cached renderer
ax.draw_artist(ln)
# show the result to the screen, this pushes the updated RGBA buffer from the
# renderer to the GUI framework so you can see it
fig.canvas.blit(fig.bbox)

for j in range(100):
    # reset the background back in the canvas state, screen unchanged
    fig.canvas.restore_region(bg)
    # update the artist, neither the canvas state nor the screen have changed
    ln.set_ydata(np.sin(x + (j / 100) * np.pi))
    # re-render the artist, updating the canvas state, but not the screen
    ax.draw_artist(ln)
    # copy the image to the GUI state, but screen might not be changed yet
    fig.canvas.blit(fig.bbox)
    # flush any pending GUI events, re-painting the screen if needed
    fig.canvas.flush_events()
    # you can put a pause in if you want to slow things down
    # plt.pause(.1)

Cet exemple fonctionne et montre une animation simple, cependant parce que nous ne saisissons l'arrière-plan qu'une seule fois, si la taille de la figure en pixels change (en raison de la taille ou du dpi de la figure qui change), l'arrière-plan sera invalide et entraînera images incorrectes (mais parfois cool !). Il y a aussi une variable globale et une bonne quantité de passe-partout qui suggèrent que nous devrions envelopper cela dans une classe.
Exemple basé sur la classe #
Nous pouvons utiliser une classe pour encapsuler la logique passe-partout et l'état de restauration de l'arrière-plan, dessiner les artistes, puis afficher le résultat à l'écran. De plus, nous pouvons utiliser le 'draw_event'
rappel pour capturer un nouvel arrière-plan chaque fois qu'un redessin complet se produit pour gérer correctement les redimensionnements.
class BlitManager:
    def __init__(self, canvas, animated_artists=()):
        """
        Parameters
        ----------
        canvas : FigureCanvasAgg
            The canvas to work with, this only works for sub-classes of the Agg
            canvas which have the `~FigureCanvasAgg.copy_from_bbox` and
            `~FigureCanvasAgg.restore_region` methods.

        animated_artists : Iterable[Artist]
            List of the artists to manage
        """
        self.canvas = canvas
        self._bg = None
        self._artists = []

        for a in animated_artists:
            self.add_artist(a)
        # grab the background on every draw
        self.cid = canvas.mpl_connect("draw_event", self.on_draw)

    def on_draw(self, event):
        """Callback to register with 'draw_event'."""
        cv = self.canvas
        if event is not None:
            if event.canvas != cv:
                raise RuntimeError
        self._bg = cv.copy_from_bbox(cv.figure.bbox)
        self._draw_animated()

    def add_artist(self, art):
        """
        Add an artist to be managed.

        Parameters
        ----------
        art : Artist

            The artist to be added.  Will be set to 'animated' (just
            to be safe).  *art* must be in the figure associated with
            the canvas this class is managing.

        """
        if art.figure != self.canvas.figure:
            raise RuntimeError
        art.set_animated(True)
        self._artists.append(art)

    def _draw_animated(self):
        """Draw all of the animated artists."""
        fig = self.canvas.figure
        for a in self._artists:
            fig.draw_artist(a)

    def update(self):
        """Update the screen with animated artists."""
        cv = self.canvas
        fig = cv.figure
        # paranoia in case we missed the draw event,
        if self._bg is None:
            self.on_draw(None)
        else:
            # restore the background
            cv.restore_region(self._bg)
            # draw all of the animated artists
            self._draw_animated()
            # update the GUI state
            cv.blit(fig.bbox)
        # let the GUI event loop process anything it has to do
        cv.flush_events()
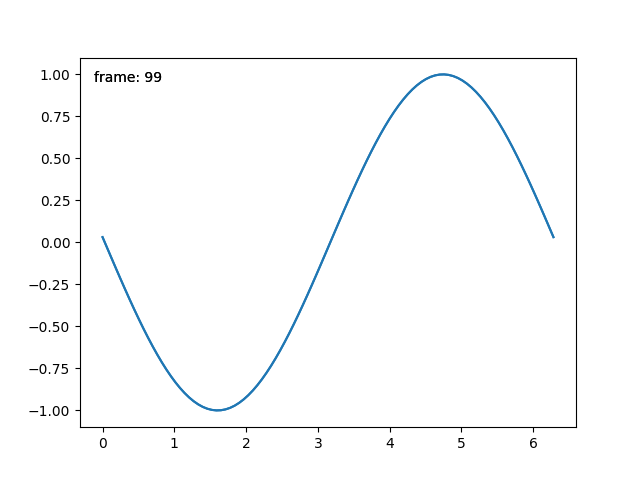
Voici comment nous utiliserions notre classe. Il s'agit d'un exemple légèrement plus compliqué que le premier cas car nous ajoutons également un compteur de cadres de texte.
# make a new figure
fig, ax = plt.subplots()
# add a line
(ln,) = ax.plot(x, np.sin(x), animated=True)
# add a frame number
fr_number = ax.annotate(
    "0",
    (0, 1),
    xycoords="axes fraction",
    xytext=(10, -10),
    textcoords="offset points",
    ha="left",
    va="top",
    animated=True,
)
bm = BlitManager(fig.canvas, [ln, fr_number])
# make sure our window is on the screen and drawn
plt.show(block=False)
plt.pause(.1)

for j in range(100):
    # update the artists
    ln.set_ydata(np.sin(x + (j / 100) * np.pi))
    fr_number.set_text("frame: {j}".format(j=j))
    # tell the blitting manager to do its thing
    bm.update()

Cette classe ne dépend pas de pyplotet convient pour être intégrée dans une application graphique plus grande.
Durée totale d'exécution du script : (0 minutes 1,185 secondes)